So a few years back, Minaal debuted with a massively successful Kickstarter campaign, funding a carry-on sized backpack designed for digital nomads and other lightweight travelers who only ever bring one bag. It’s been on my list of favorite travel backpacks ever since.
But competition has heated up since then, as more and more people realize that hauling a coffin-sized suitcase up a flight of stairs is a terrible idea. So Minaal has been hard at work on version 2.0, building on the original design with a number of seemingly-tiny details that add up to some major conveniences. It was already good, but now it’s even better. The video of them frolicking with their bag on the Kickstarter page was pretty fun too.
I’ve had my eye on this one for a long time, due to the size, features, and the professional appearance, and they sent me an early sample before the final production phase for testing and feedback (meaning there might be tiny differences between this one and the final version, but probably nothing noticeable). But enough about me. Let’s just get to it.
Minaal Carry-on Backpack 2.0
Here it is:

Stats
Stupid American numbers:
- Height: 21.65″
- Width: 13.77″
- Depth: 7.87″
- Weight: 3 lbs, 10 oz (including rain cover and hip belt)
- Capacity: 35 liters (yes, Americans sometimes use liters too)
Civilized metric units:
- Height: 55 cm
- Width: 35 cm
- Depth: 20 cm
- Weight: 1.64 kg (including rain cover and hip belt)
- Capacity: 35 liters
Price: $300
(The rain cover is included, but I think the hip belt will be sold separately. You’ll probably want it, though.)
The first thing you might notice is that it’s smaller than other maximum-sized carry-ons, which is deliberate; certain budget airlines in Europe have smaller luggage allowances than most North American airlines, making this a global carry-on, rather than just a North American one. If you can get by with less gear, you’ll gain the convenience of never having to check a bag. Also, the dimension that’s reduced most significantly is depth, meaning the weight will stay close to your back, just as it should.
What it looks like
Here’s the front:
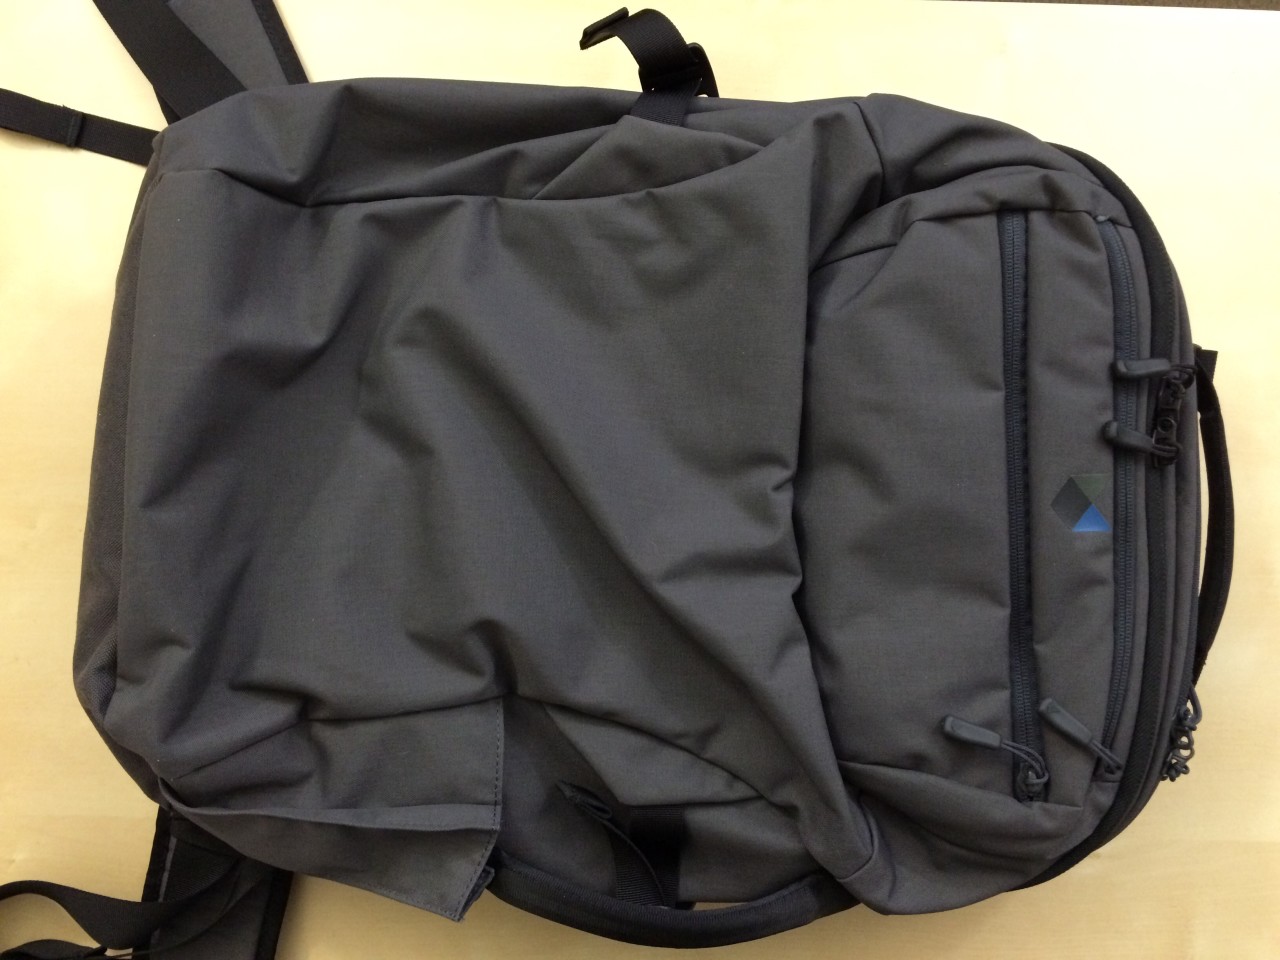
This is the side that’s most likely going to end up flat on the ground, so it’s nice that it’s clean and unadorned.
Here’s the back panel:
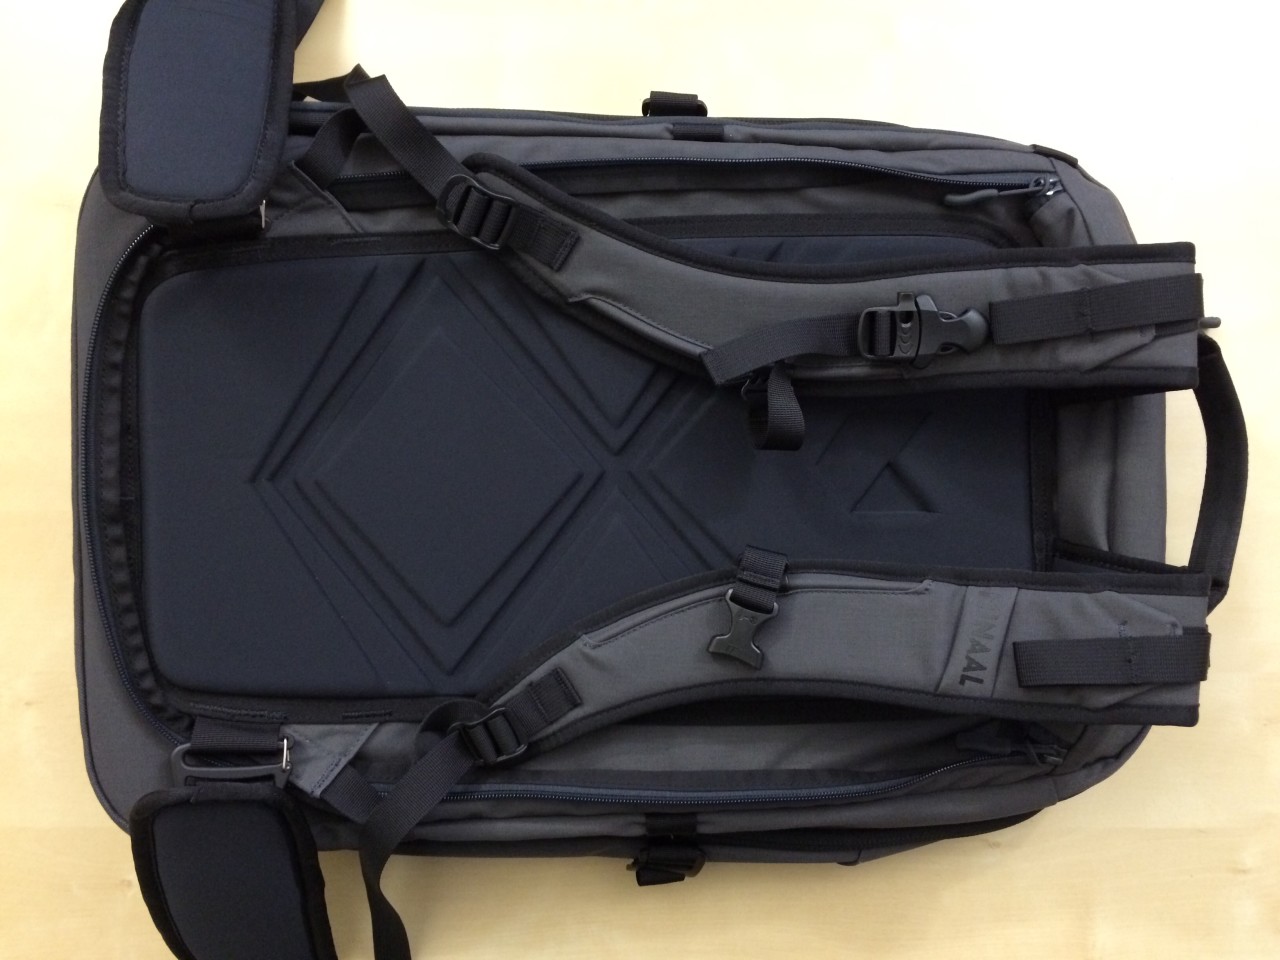
Details worth noticing here include the cutouts in the back panel foam, which allow a bit of air circulation, and the clip to keep the sternum strap out of the way when you’re not using it. You can also clip things onto that strap that says “Minaal” on the left shoulder strap. It’s a good place for sunglasses, for example.
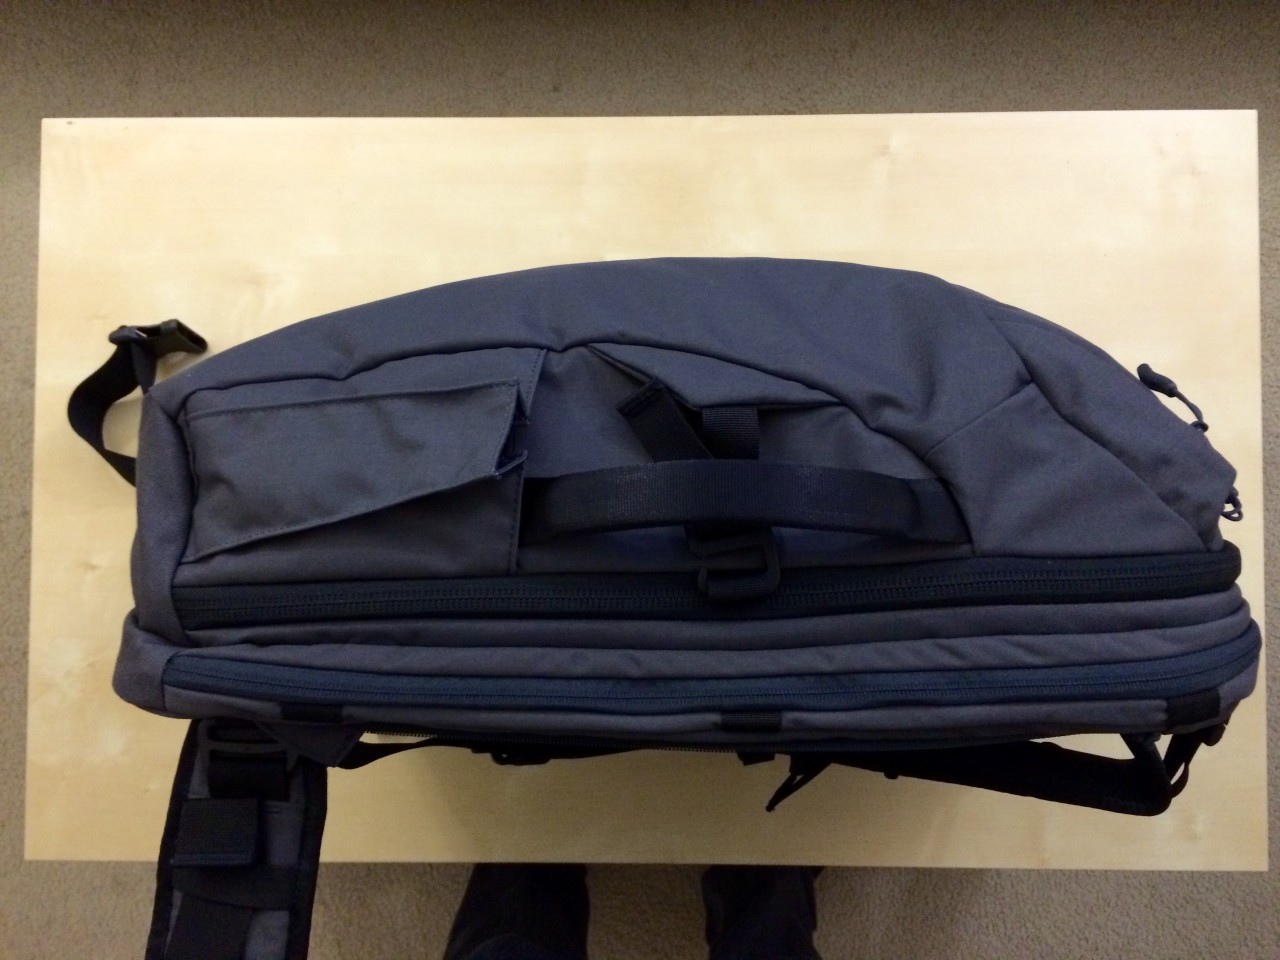
Here’s a view from the side (which is the top, when carried like a suitcase).
Here’s the other side (or the bottom, when carried like a suitcase, so there’s no pocket on this side):
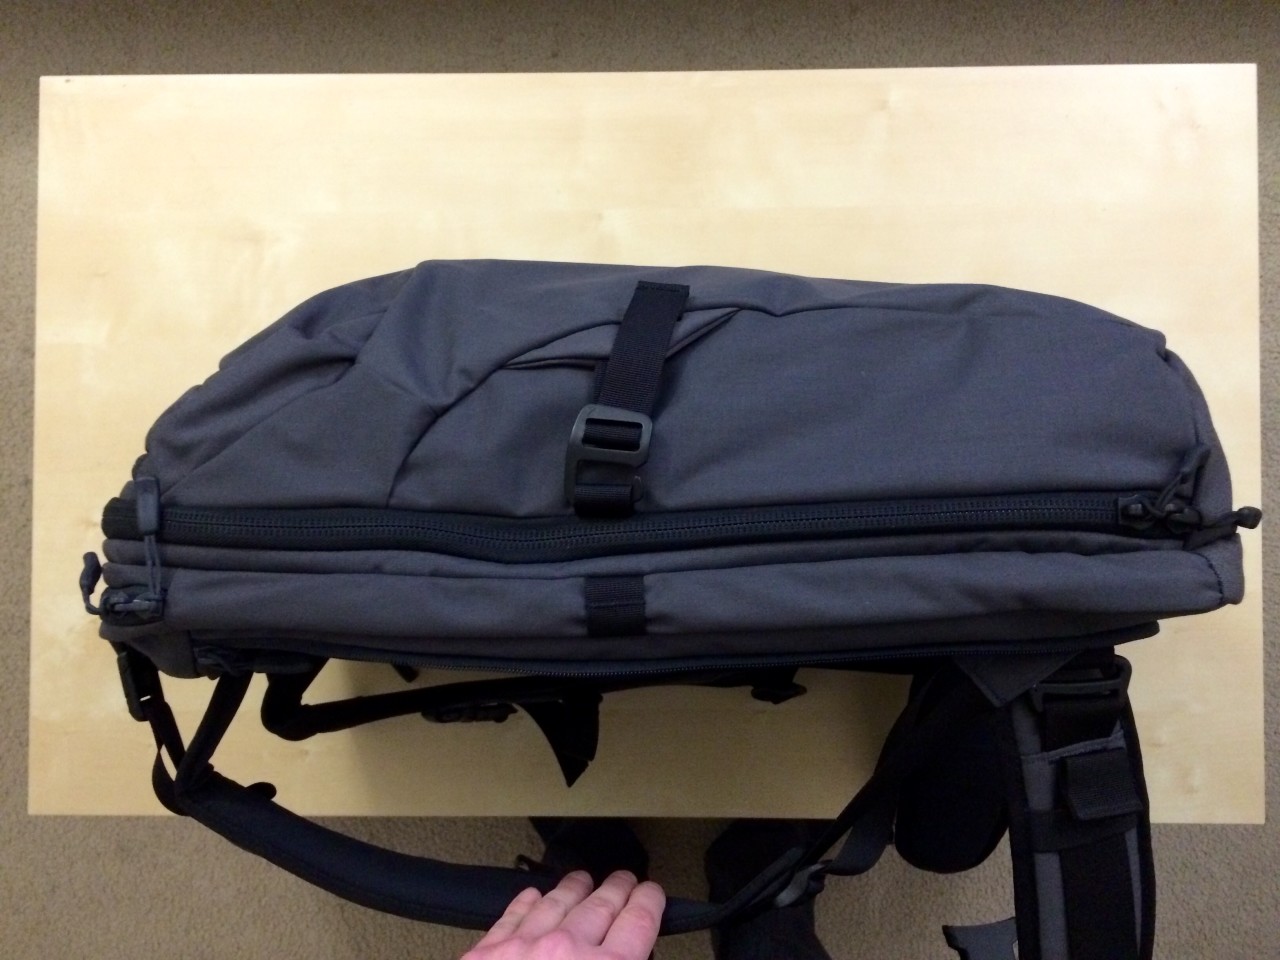
While we’re over here, you might notice one of the major changes to this version of the pack, which is how the side compression straps no longer use a quick-release buckle (the type used on the sternum and waist strap), but instead use a metal hook, which attaches to a small loop of nylon webbing. This not only allows for more compression, but the hook can be fixed in two positions; over the zippers, or out of their way:
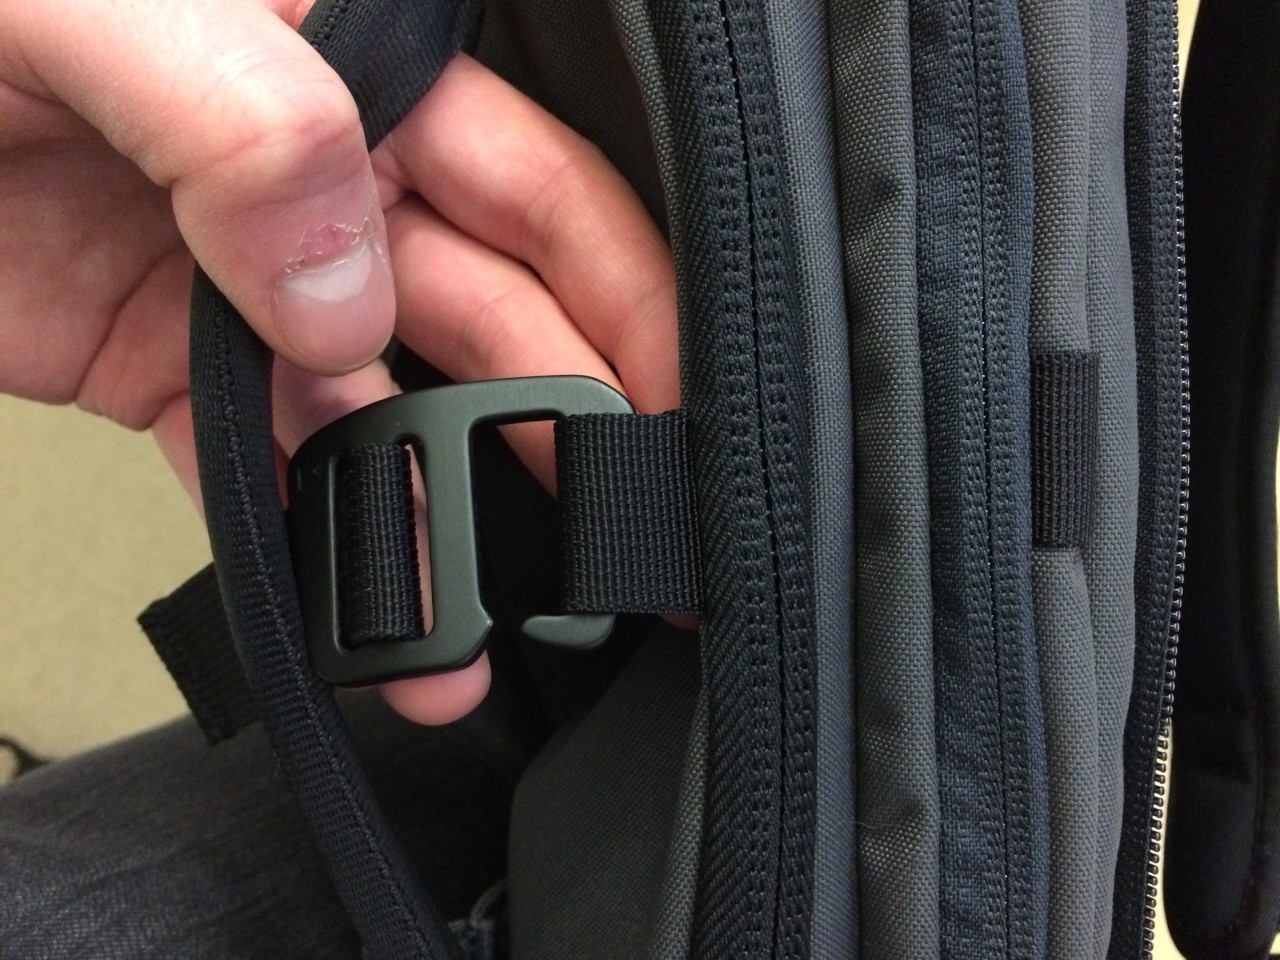
While the original version required you to unclip the buckles to open up the pack, this version does not. The only time you might want to hook it all the way over is if you’ve overpacked, and you want to take some of the stress off the zippers. Aside from that, you can just leave the hooks clipped on that side forever, and never deal with them ever again. Despite being a simple clip update, it’s a major simplification.
What’s inside
Before we open things up, notice how the main compartment and laptop compartment both have locking zippers, and they’re close enough together to use the same lock:

And yes, there’s a technique that allows thieves to open a zipper, even if it’s locked. It’s very annoying. But if you loop the lock through that grab handle, at least they won’t be able to hide the evidence. Just remember that nothing is ever 100% secure, but locking zippers are such an easy feature to include that I think it’s good to have them available.
Okay, moving on. Here’s one of the defining features of any good travel backpack: The ability to open up like a suitcase. If you’ve ever needed to dig something out of the bottom of a top-loading mountaineering pack, you’ll know how big a deal this is.
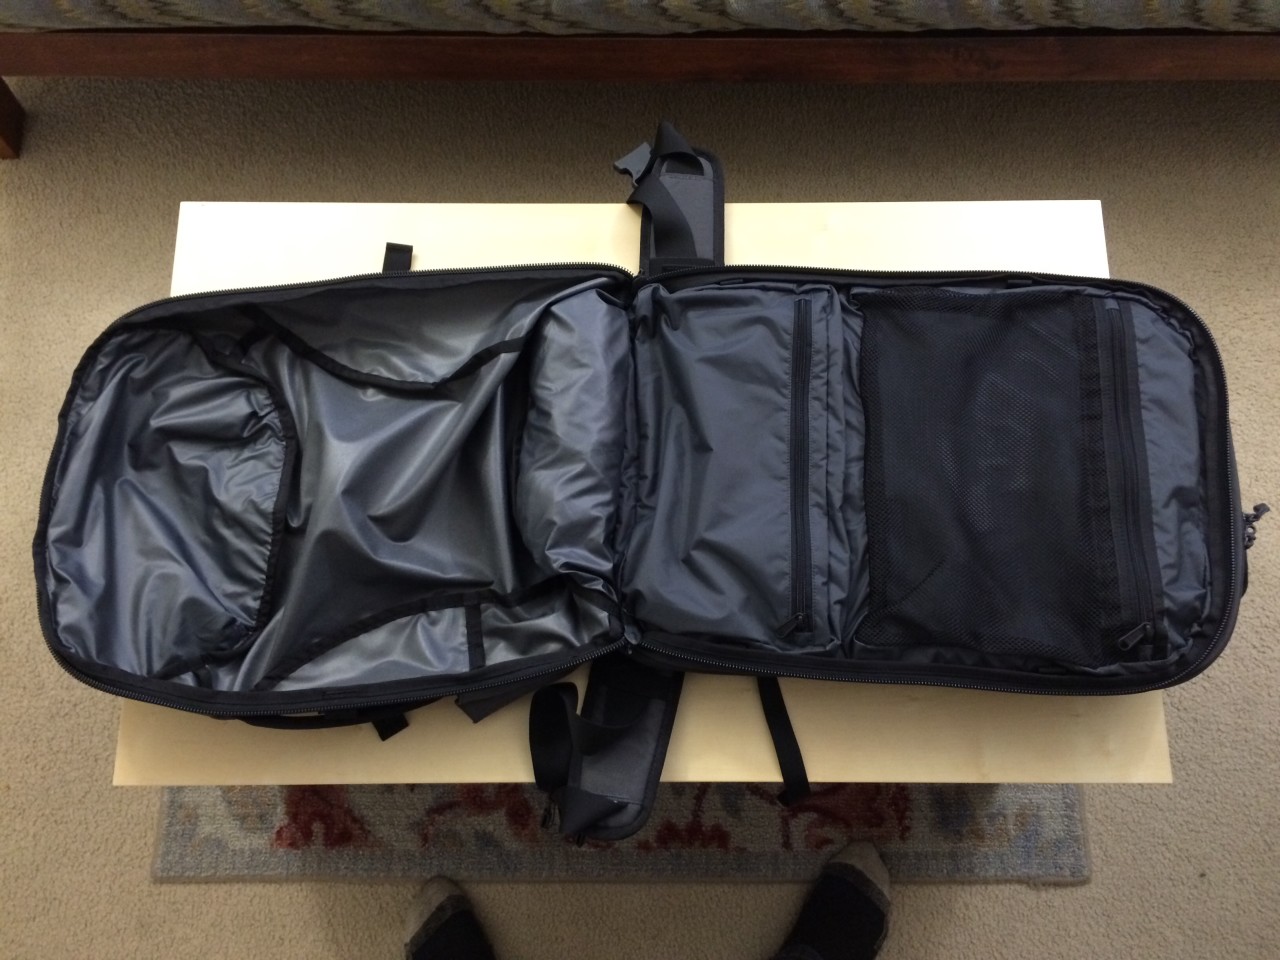
Speaking of organization, another major change with this version is that the two zippered pockets on the right are now three-dimensional, making them much more spacious than before. They’re basically built-in packing cubes now.
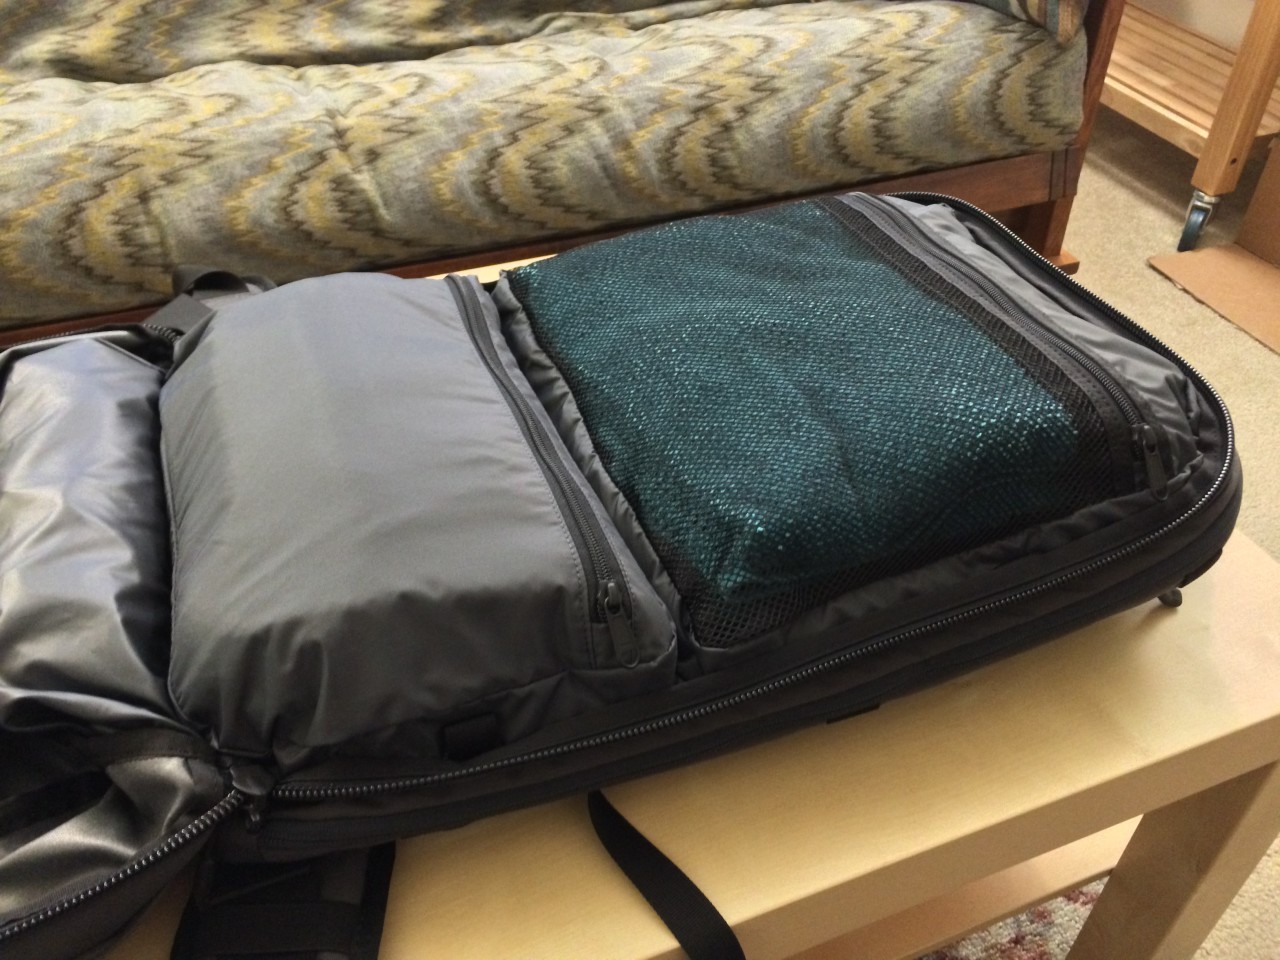
This is actually even more helpful than you might imagine, because it mitigates one of the only potential issues with the overall design; because the main compartment is just one giant pocket with soft-sided walls, it has a tendency to collapse. It can be tricky to zip shut without small items falling out, whereas a backpack with more rigid walls wouldn’t do that. You can solve this problem with packing cubes, but with these are built right in, the overall design is now a lot more functional.
Since they have straight zippers instead of U-shaped zippers, I’d say they’re better at storing a few medium-sized items, rather than lots of little things. It can be difficult digging to the bottom of each pocket if all you pack in there is a bunch of socks, for example. It’s not a bad idea to use at least one “real” packing cube for smaller items in addition to the built-in pockets, and they’ve announced custom-sized packing cubes that’ll be available for this.
Moving on to the laptop compartment:
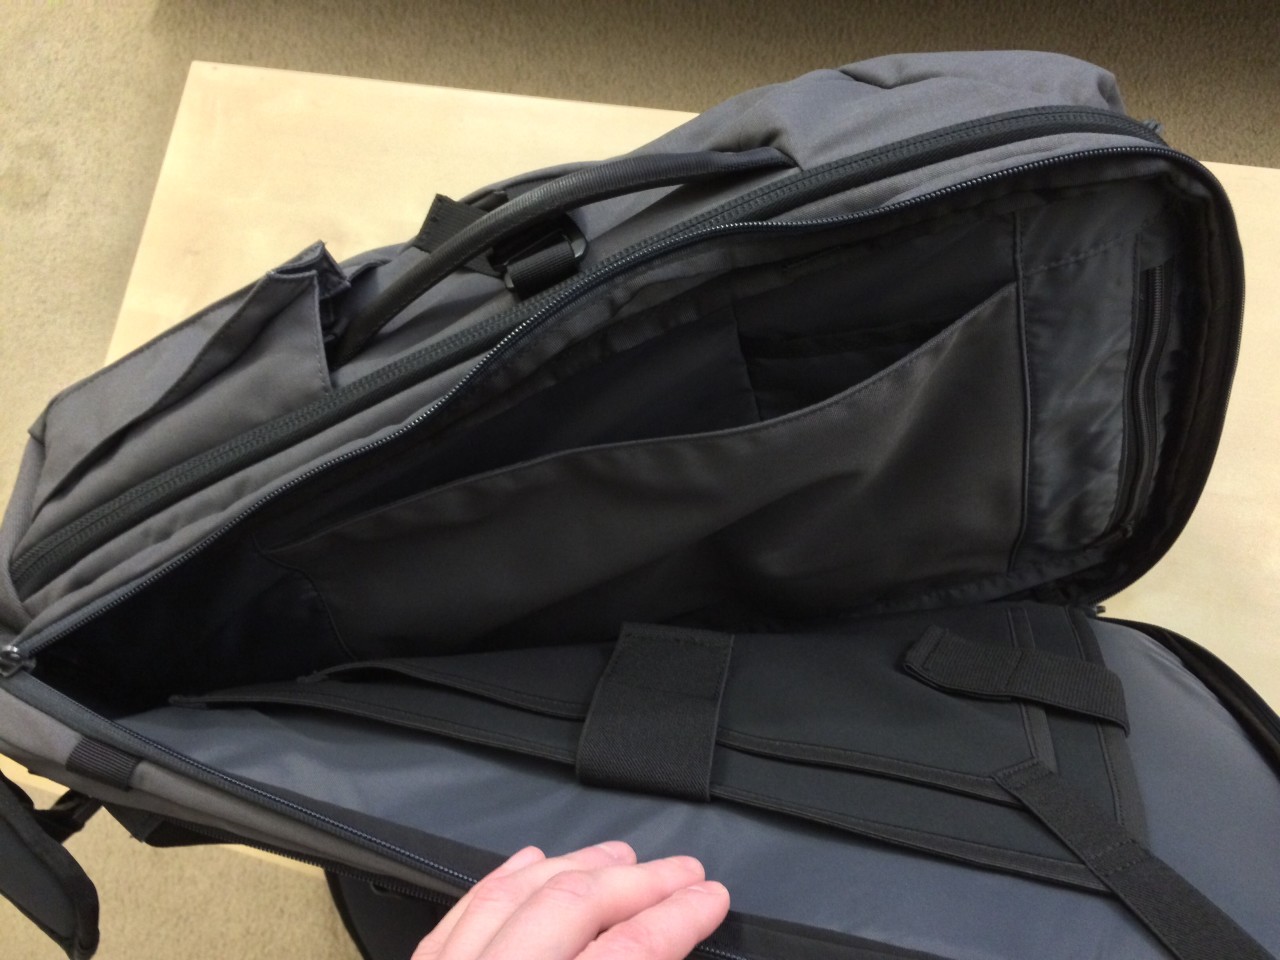
It might be hard to see them all, but there are actually five compartments in there. On the bottom of the photo, you’ll see both a laptop sleeve and a tablet sleeve (both of which can be accessed either from the top or the side of the bag, which is a nice new feature). On the opposite side, there’s a document sleeve, for holding papers and notebooks, with a separate passport pocket inside. Lastly, there’s a zippered compartment just to the right, which is long and skinny, for pens, pencils, and maybe some cables.
A couple dedicated pen and pencil slots would have been useful, though you can use the passport pocket or the zippered compartment for those pretty easily. Also, I thought it might be good to have this compartment open up with a U-shaped zipper as well, but apparently testers said it was too big and floppy, so they stuck with the L-shaped one.
Transforming from suitcase to backpack
One of the major features of the bag is how the straps can be zipped away, so they’re better protected in case you need to send it through as a checked bag:
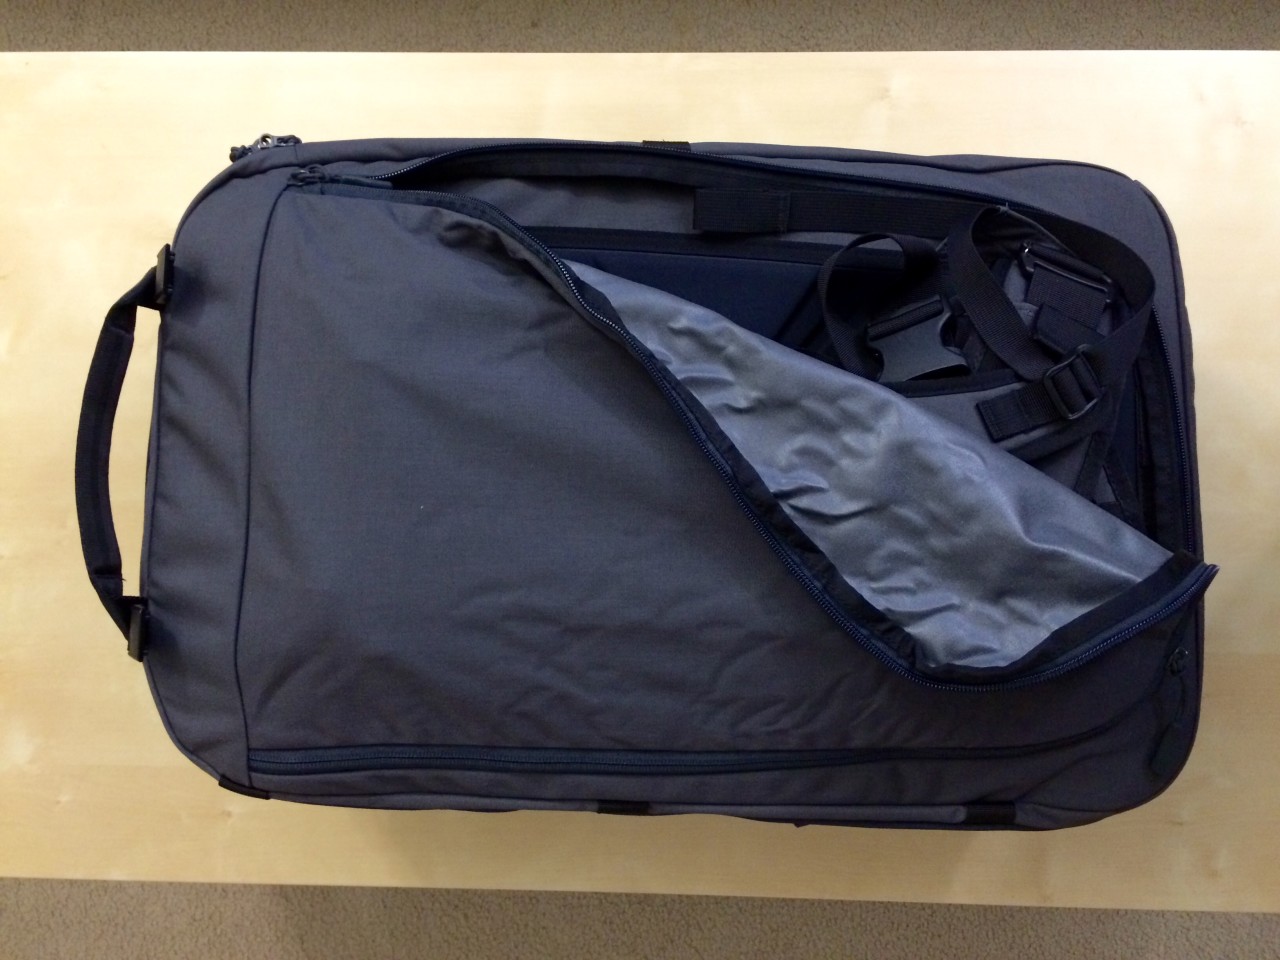
That panel is made of the same tough Cordura nylon as the rest of the bag, so the shoulder and hip straps won’t get snagged during transit.
When you convert it back to a backpack, you roll that panel up and tuck it back just above the shoulder straps, then clip these straps over it, which in this version are now magnetized:
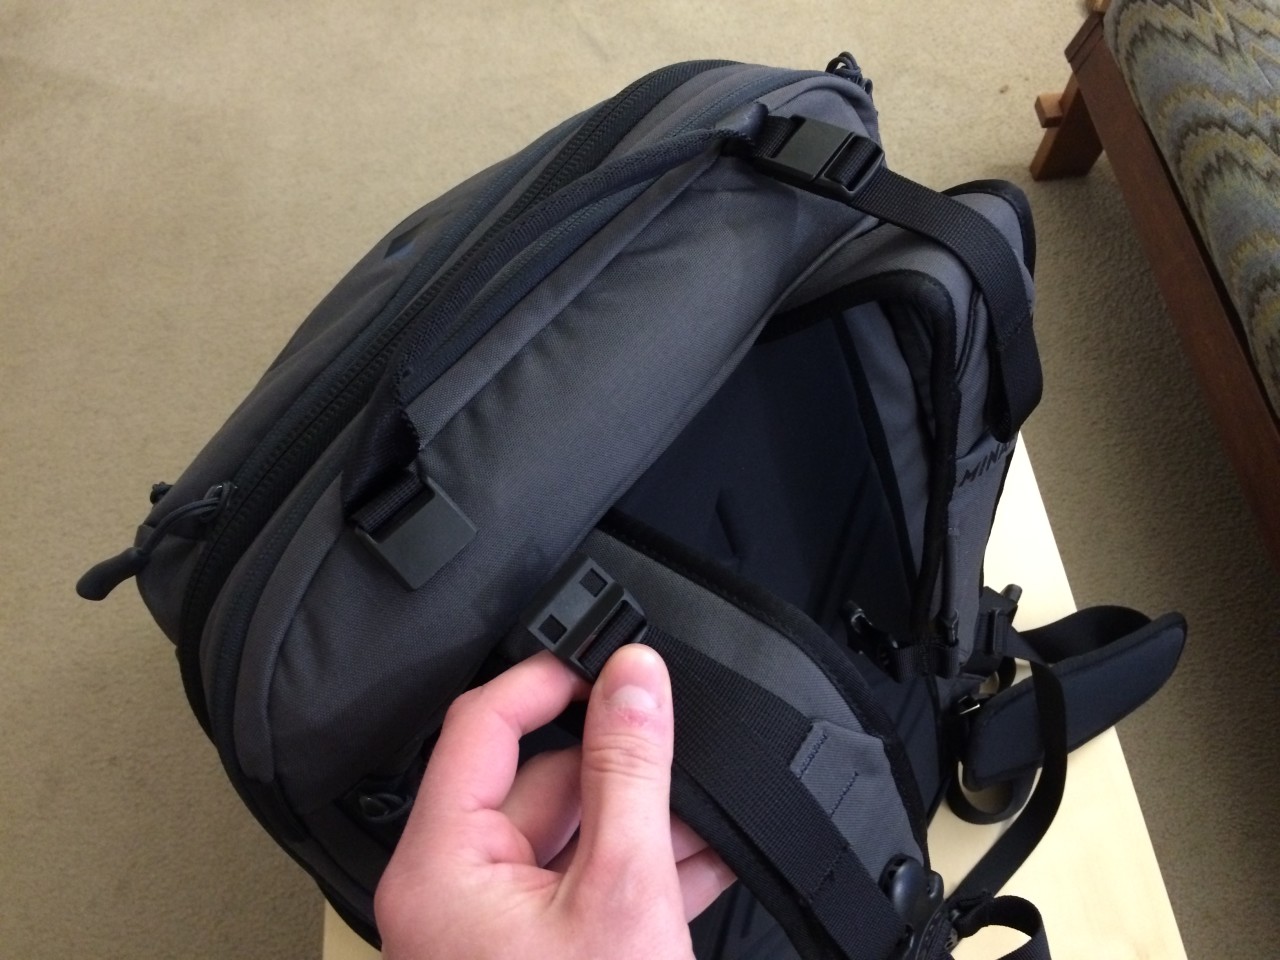
Not only do the magnetized clips snap themselves into place, but the clips are also directional, kind of like hooks; with the straps pulling them tightly in one direction, they’ll stay in place, but all you have to do to detach them is push them the other way. This is a dorky thing to get excited about, but if you have to convert it back and forth from a backpack to a suitcase over and over again, you’re going to love this. It literally could not be simpler.
While we’re on the subject of straps, another major addition is the optional padded hip belt. It clips into an unobtrusive loop of nylon webbing, like this:
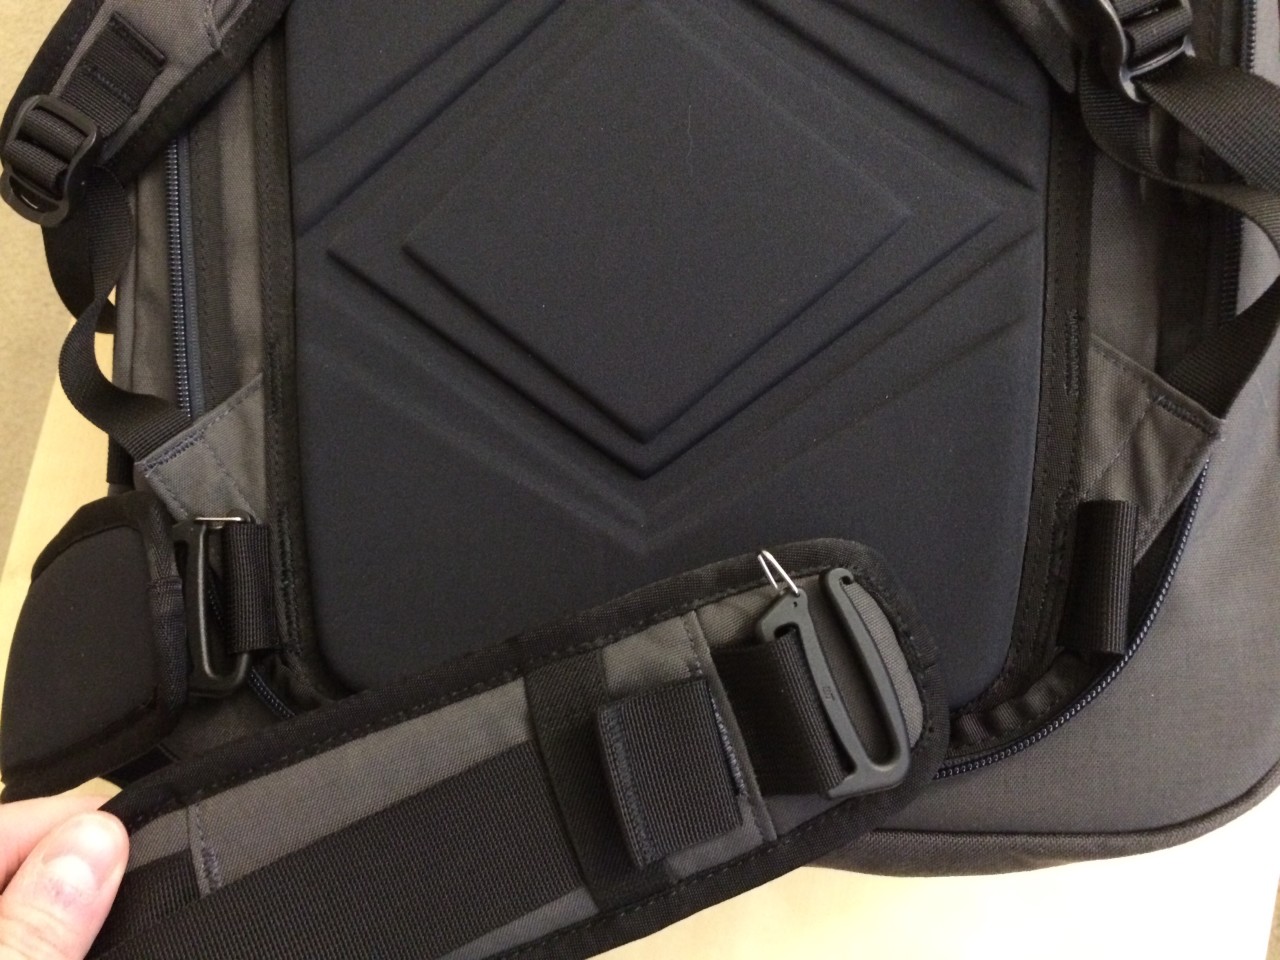
It definitely feels like a “real” hip belt, and I expect for users of the original version (which had a non-padded hip belt), it’ll be a welcome change. It feels comfortable, and the clips are really easy to operate, while still feeling secure. And if you decide not to use the hip belt, all that’s left behind is a tiny loop of fabric that won’t get in the way.
Outside pockets
Not counting the main compartment or the laptop compartment, this bag features three pockets accessible from the outside (unless you count the rain cover compartment, which would be a fourth), which are helpful for storing small items that you need to grab quickly.
Along the side is the water bottle pocket, made of a tough fabric instead of mesh, so it’ll last longer. It also has an adjustable, elastic cord to hold things snugly, regardless of size:

At first I thought that a conventional pocket with an elastic band sewn across the top would have worked better, but then I was informed of this little trick:
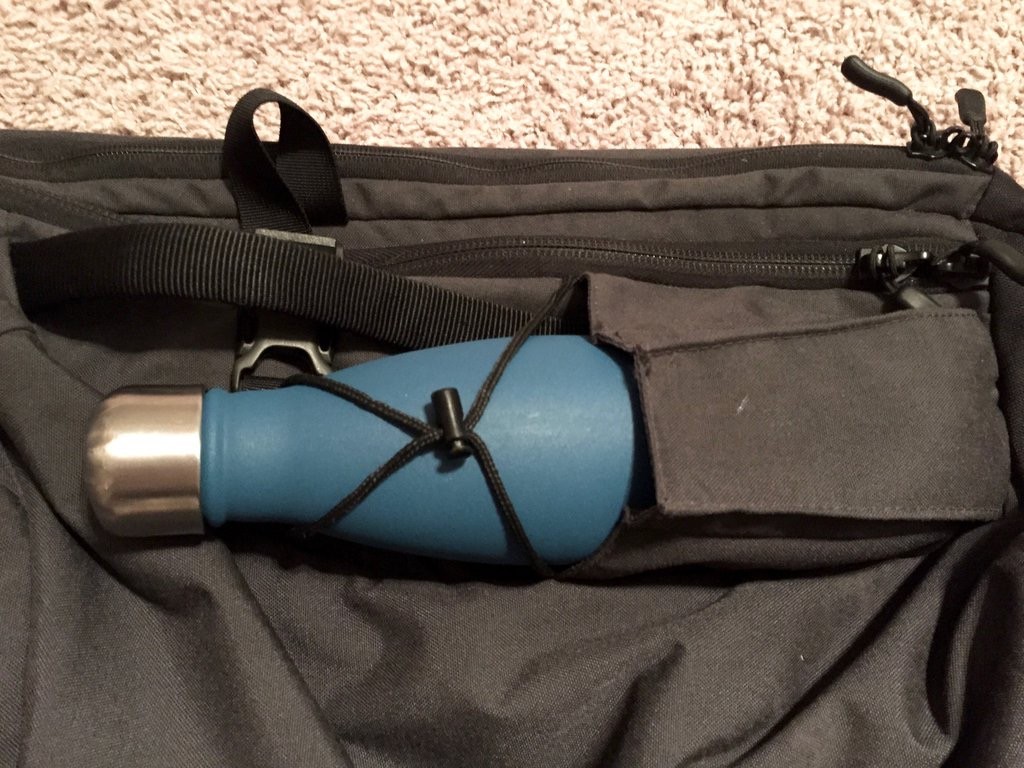
This allows you to hold bottles securely, even when the pack is lying horizontally in a cargo hold. As you can probably guess, it works best with tapered water bottles, like that one.
But I like storing the water bottle up here too:
Sure, it’ll take up some internal space, but it’ll keep the weight balanced, and it won’t fall out. I like using that side pockets for even smaller things, like maybe an umbrella.
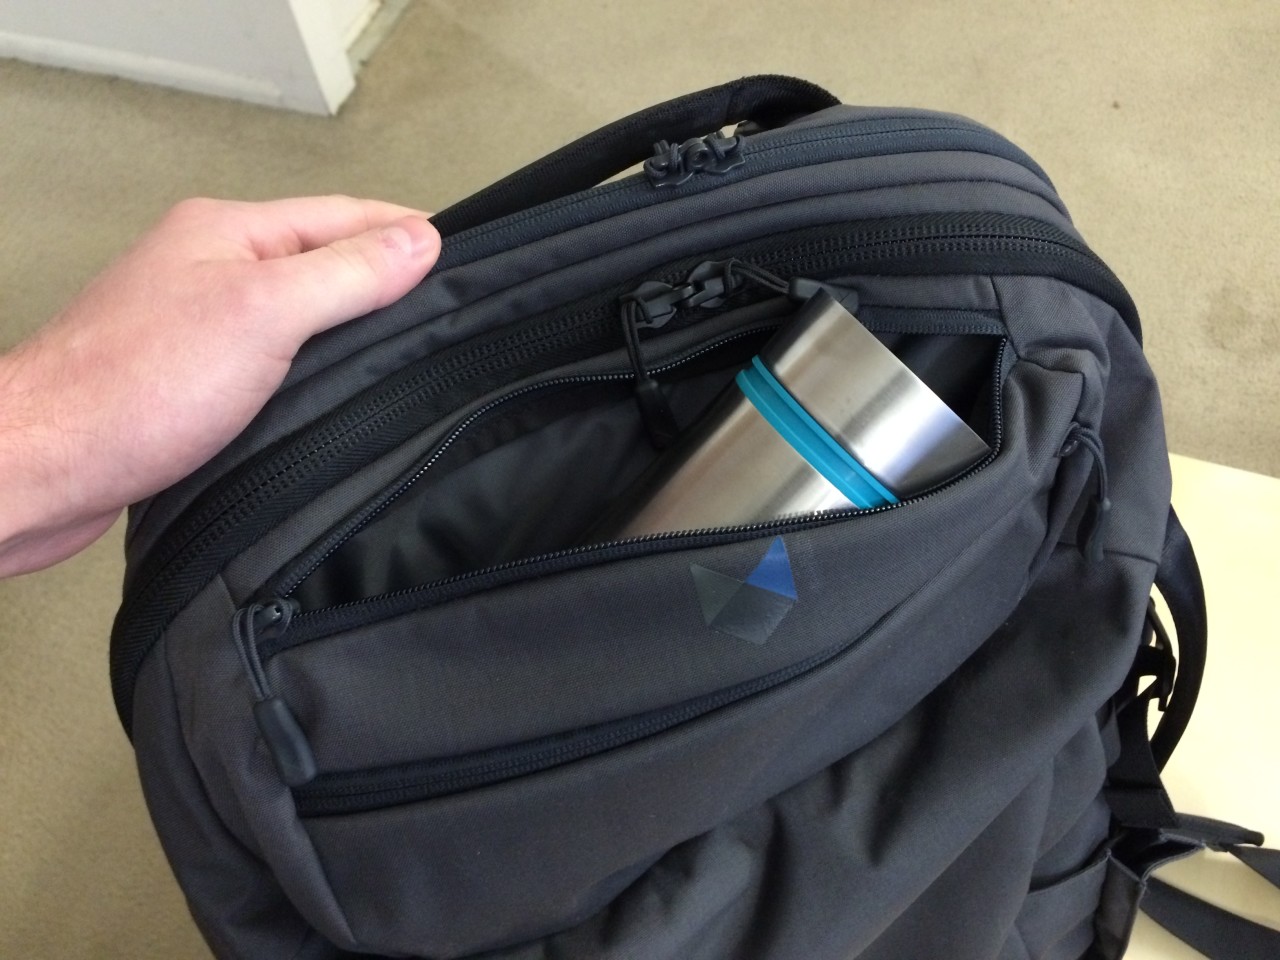
There’s also a second pocket across the top, with a key clip:
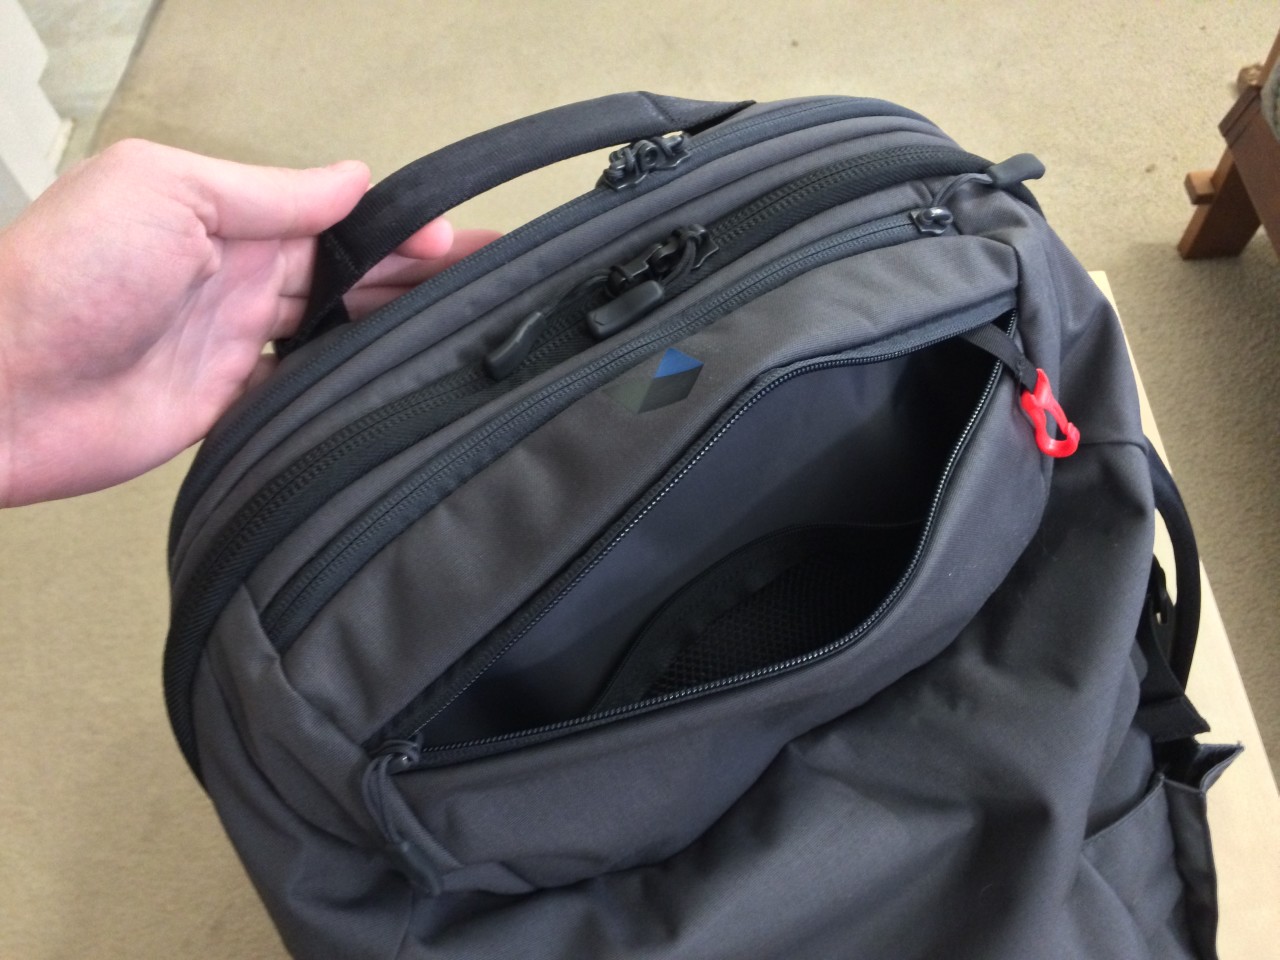
If you look closely, there’s also a hidden, zippered pocket inside this one. I’d be willing to bet half the users of this pack don’t even know it’s there, because it’s hiding so well.
There’s also a hidden compartment along the bottom of the pack, which includes a detachable rain cover:

When it’s packed up inside, it forms a cushion along the bottom of the pack. It also has a tiny stuff sack built into itself, so you can store it elsewhere, or leave it at home.
(Oddly, the rain cover elastic on mine was incredibly tight; I actually switched it with the rain cover from the new Minaal Daily backpack, which was bigger for some reason. I expect this may have been a random error, and I only just noticed it…but if you get one that seems really tight, maybe send them an email about it.)
Conclusions
There was a moment a few years ago when more and more carry-on sized backpacks started showing up, and Minaal was a big part of that, with the winning combination of carry-on dimensions, suitcase-style entry, laptop protection, and rugged good looks. With this update, they’ve enhanced the functionality, by adding the padded hip belt, the 3-D organizer pockets in the main compartment, the document sleeve, and all the new clips, which make using the bag a lot simpler. Despite looking like minor tweaks, I think they’re great improvements to an already-great design.
The only things I might change would be to use a more conventional water bottle pocket with sewn-in elastic (although now that I’ve seen that elastic loop trick, I’m coming around to it), and I’d probably add a few pen or pencil slots somewhere. I might also test out U-shaped zippers on those 3-D compartments, to make them even more like packing cubes. As mentioned, the walls of the main compartment have a tendency to collapse, so you’ll want to make use of those 3-D compartments to mitigate this problem, or use a few packing cubes to keep things together. And sooner or later they should probably add more colors, because this has been doing so well that someday there’ll be six people in the same hostel with the same bag.
Certain people out there might want a larger bag, or a cheaper one; but this was designed for digital nomads who travel with a single carry-on. As such, it’s sized to accommodate the strict requirements of budget carriers, and is densely packed with lots of built-in features, which is reflected in the price. It’s easy to see why it’s been such a consistent Kickstarter success. I really like it.
So if you like what you see, get it here.
And enjoy a bonus kitty: